Previous: Instrument Panel Work |
| |
|
1/31 - 2/7/11 - Wingtip Lights - 20 hrs
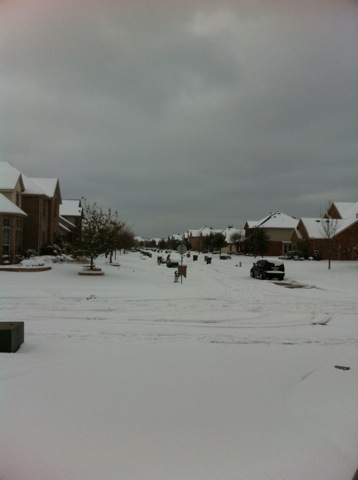
It's super bowl week here in North Texas and we have been surprised by an ice storm followed by a snowstorm. The roads are covered by a layer of ice and a layer of snow, so they are pretty treacherous. Local schools have been cancelled and businesses have been closed. The Packers and the Steelers should feel right at home in this weather, I would think.
It's pretty cold in the garage, so I decided to work on something I could do indoors. That something turned out to be the wingtip lights.
|
 |
| |
|
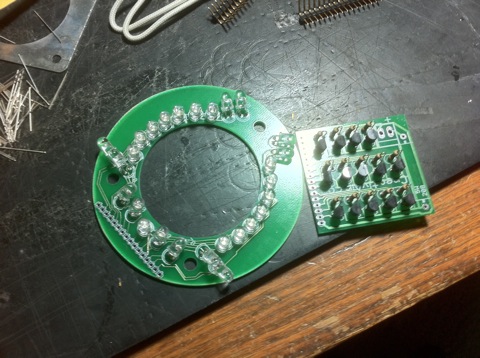
My wingtip lights are made up from several different products. I started with an LED position light kit that I got from CreativAir. I think they must have gone out of business because their website is no longer active. You can still get the kit from the original designer at http://www.killacycle.com/Lights.htm
I have cut the circuit boards using my circle cutter. The shape minimizes the amount of circuit board material that will be visible. |
 |
| |
|
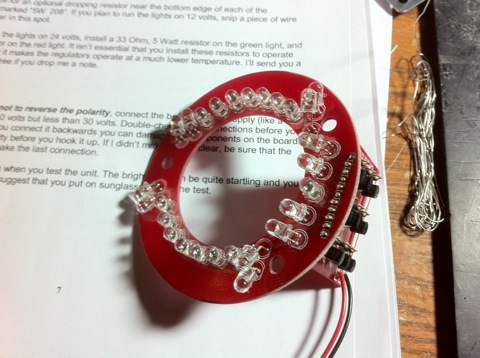
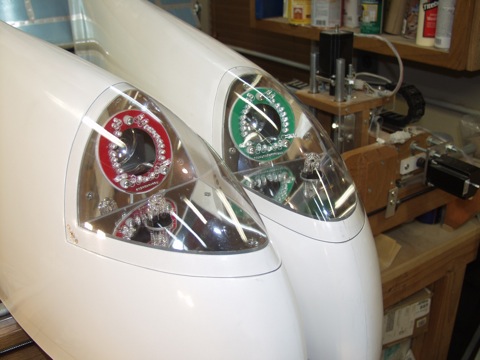
Here is the left position light all built and ready to go.
|
 |
| |
|
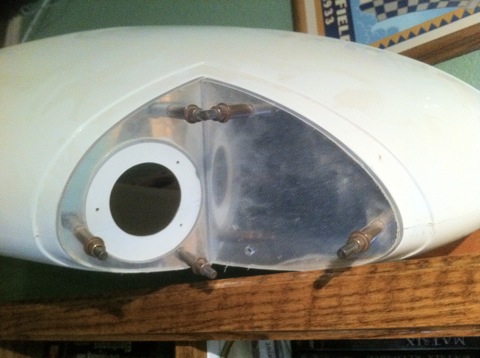
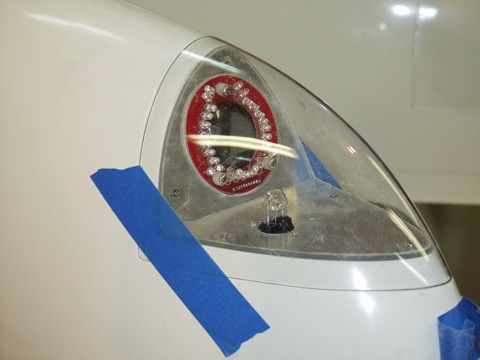
This is my wingtip. I have cut a piece of mirrored lexan to match the shape of the cutout area. I then cut a hole to match the size of the circuit board.
|
 |
| |
|
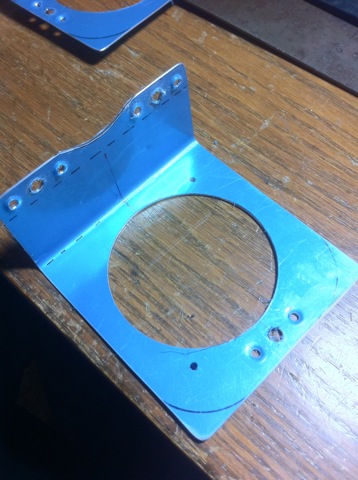
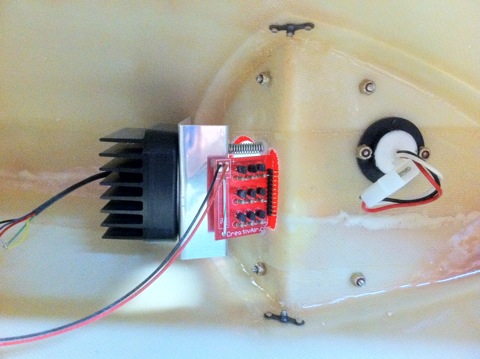
The second piece of the wingtip lights are the LED landing lights from AeroLEDs. The lights I am using are called Sunray Plus. In order to use them in the wingtip I had to fabricate a mounting bracket that would hold the light securely while allowing the angle of the light to be adjusted by turning one of three screws.
|
 |
| |
|
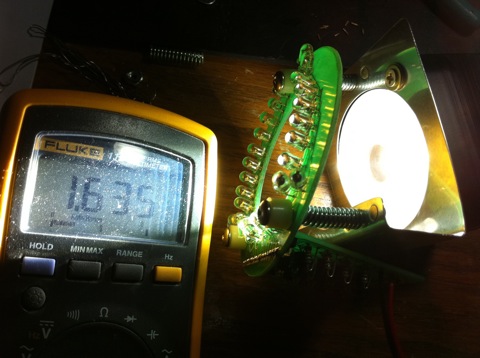
Here you can se the LED landing light being tested. The meter is showing the amps at 13.8 volts. 1.635 amps per landing light is pretty good I think.
You can also see the springs that allow the adjustment of the landing light angle.
|
 |
| |
|
The third part of the wingtip light trio is a generic strobe system that I bought online from a place called Strobes N More. The kit I bought is the Pro System 4. It includes the power supply, cables, and four strobes. I'm only using two of the strobes because I am planning to use the Whelen tail strobe for the third one.
I mounted the strobes in the wingtip facing away from the plane. You can sort of see them through the lens in this picture.
|
 |
| |
|
Now it's time to cut the lenses. Instead of marking on the lexan with a pen, I chose to use masking tape.
|
 |
| |
|
| |
 |
| |
|
With the lenses properly trimmed, I removed the protective plastic from the mirrored lexan.
|
 |
| |
|
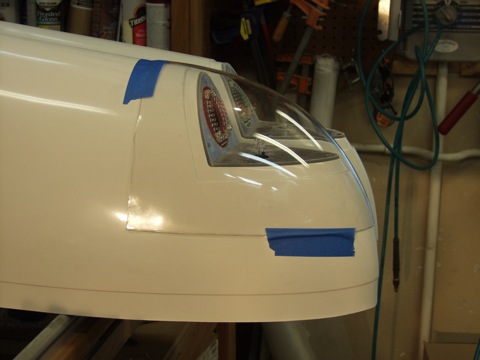
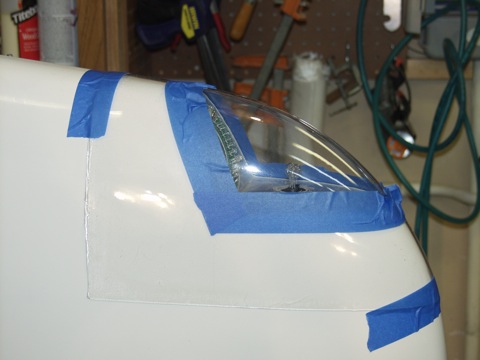
Here is what the landing light looks like from the front of the wing.
|
 |
| |
|
Here is the inside of the wingtip. The thing on the right is the strobe.
|
 |
| |
|
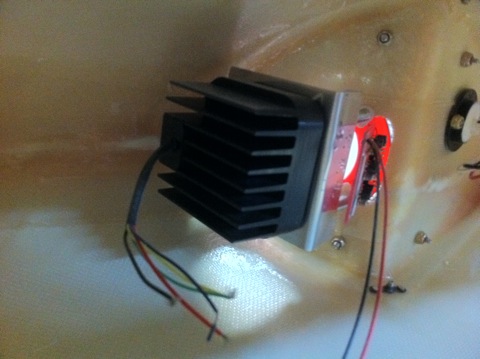
| One last picture of the landing light. Notice the heat sink built onto the LED light. |
 |
| |
|
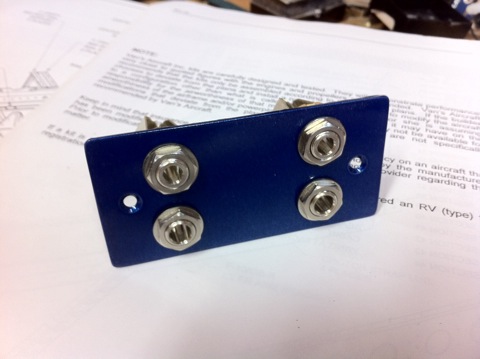
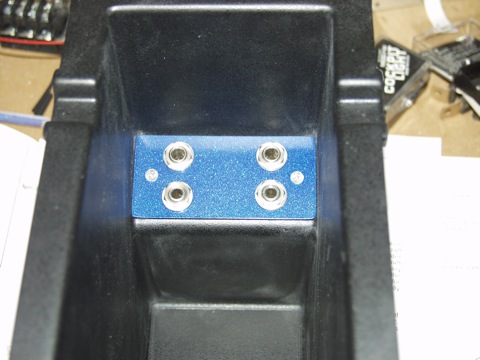
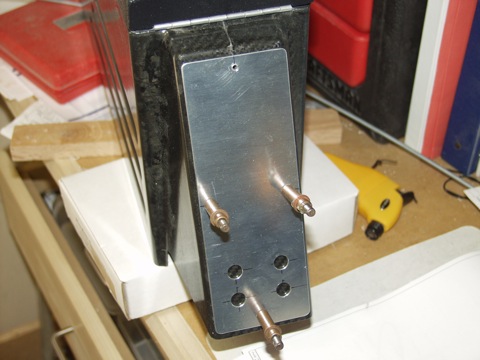
The other thing I worked on this week was the headset jacks. I am putting all of the headset connections inside the armrest. I got the armrest from Aerosport Products and the armrest has spaces designed specifically for the installation of headset jacks. So all I had to do was fabricate a couple of panels.
This panel is for the pilot and copilot headsets, and it goes inside of the armrest. |
 |
| |
|
| |
 |
| |
|
This panel is mounted on the back side of the armrest and provides headset jacks for the rear seats.
So congratulations to all the Packers fans out there. I was rooting for you since I spend at least one week a year in Wisconsin.
Next: Cowl |
 |
| |
|
| |
|

