Previous: Section 45: Cabin Doors |
| |
|
9/1-11/1/09 - Overhead Console - 20 hrs
Yeah, I know I haven't updated the site often enough. The build has slowed down for various reasons, but I really should update the site more often.
So I am going to do so by digging up some of the pictures I've taken in the past few months and try to recollect what I was doing at the time. Heh.
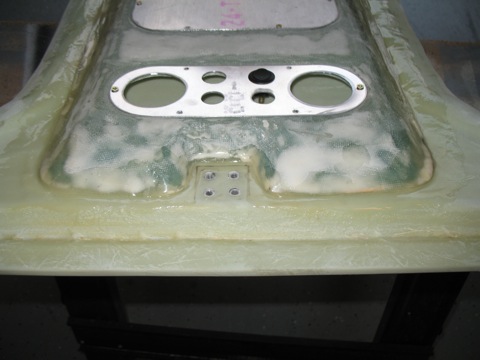
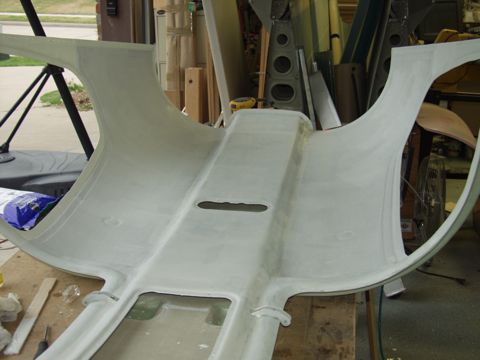
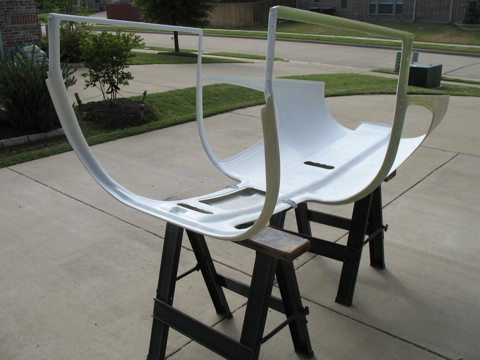
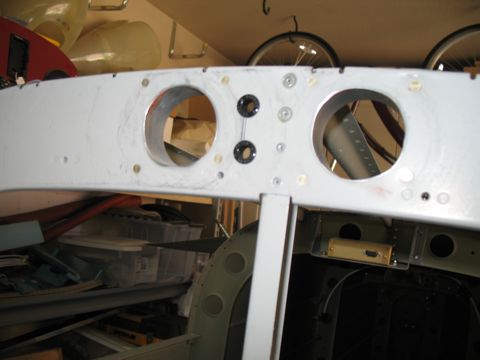
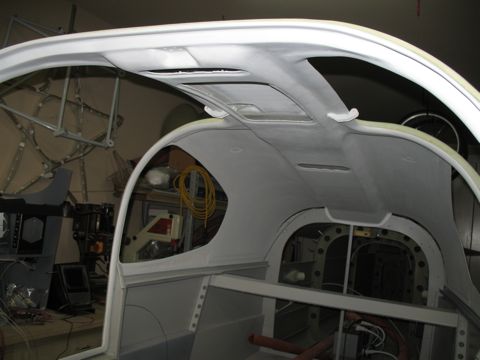
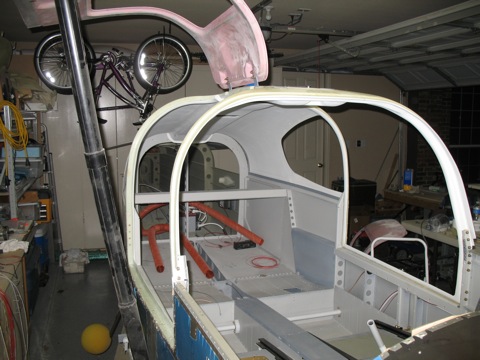
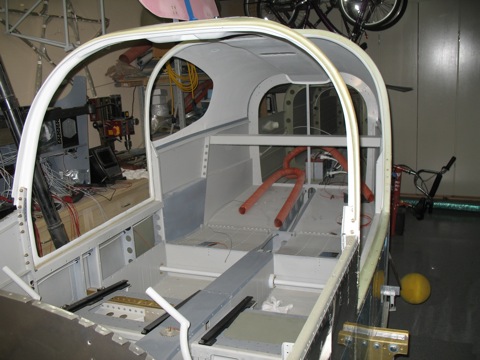
So heare are a few pictures of my homemade overhead console. This thing took a good amount of time, but it's looking good. This work took place in the fall before the weather turned cold. |
 |
| |
|
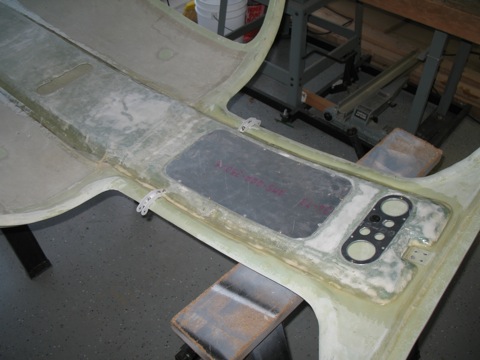
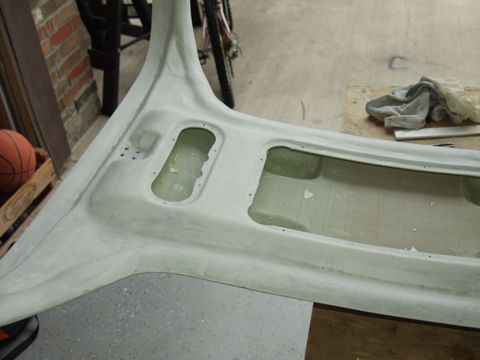
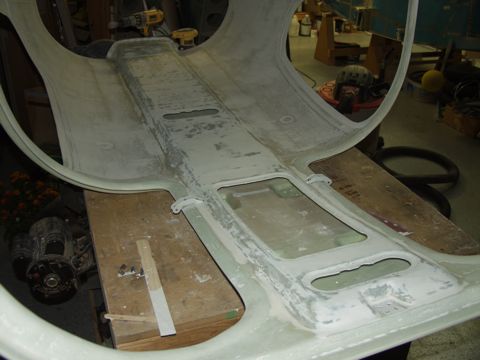
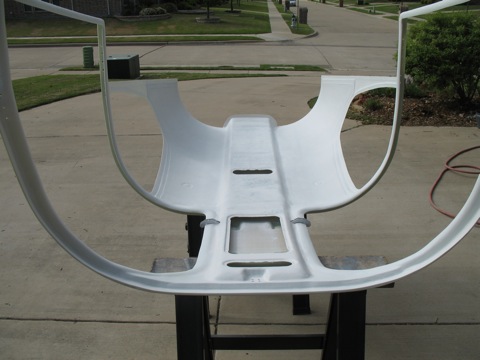
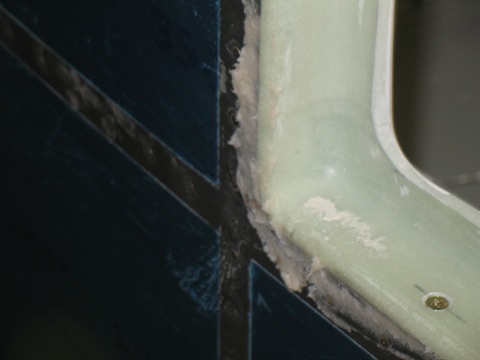
These pictures show some of the incremental work I did on the transition between the cabin top and the center console.
What you can't see here are the hours and hours of sanding and filling that took place before, during, and after when these pictures were taken.
|
 |
| |
|
After all the work I've done so far on the cabin top, I've now realized why so many people add a fabric headliner. It can cover so many imperfections that would otherwise need to be sanded to perfection. So I think that's what I will do as well. I just have to figure out what to use for the material. |
 |
| |
|
4/17-4/18/10 - Flange, Sanding - 8 hours
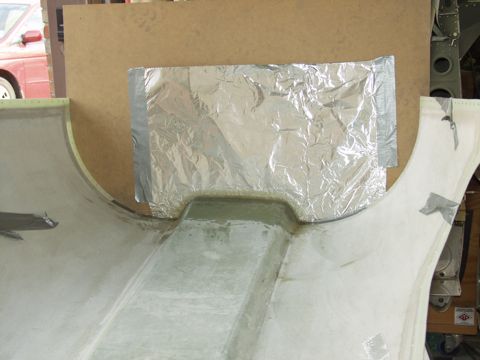
I've had the cabin top clecoed on the plane for the past few months while I work on other things. One item that I had neglected when I made the overhead console was a flange at the back. This is needed in order to seal the tunnel against the baggage bulkhead to keep the incoming forced air from blowing out. So I created an artifical bulkhead with a piece of MDF and some aluminum foil.
It is worth noting that aluminum foil is not a very good mold release. I had to heat the foil to be able to remove it from the layup. So next time I would definitely apply some wax or use a different material altogether. |
 |
| |
|
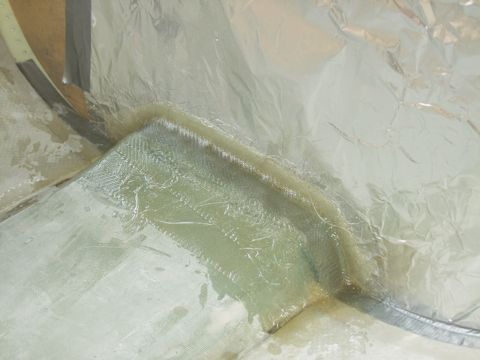
I used at least four layers of 8oz bid cloth, and I overlapped them moving forward in order to provide some extra support. The flange is probably more like six ply, because I applied extra layers of cloth to that section.
|
 |
| |
|
After allowing the flange to cure, I rolled on my first application of UV Smooth Prime. This stuff is supposed to fill the pinholes in the bare fiberglass. It is also water soluble, so it's quite a bit more pleasant to work with than the epoxy. |
 |
| |
|
I tried to apply a thin coat of the UV Smooth Prime with my roller. Future applications will most likely be sprayed.
|
 |
| |
|
This stuff dries quickly, so before long I was busy sanding away most of it. You can't really tell where your problem areas are until you apply the primer and start sanding. Then it becomes evident where the low spots are.
|
 |
| |
|
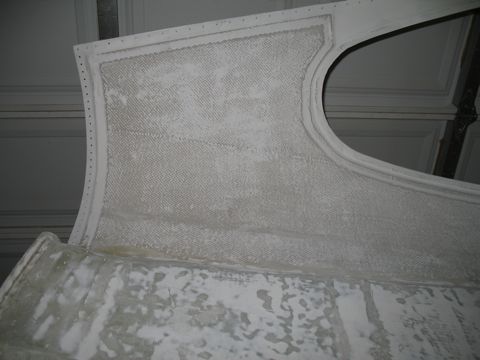
So here's the flange after sandang a way a good portion of the UV Smooth Prime. After looking at this picture, I can see that I need to work on the shape of the flange a bit more.
|
 |
| |
|
4/19/2010 - More Sanding - 1 hour
I spent an hour sanding away more of the UV Smooth Prime, as well as some micro that I had applied to some low spots last night. I think it's getting close to needing another coat. |
 |
| |
|
4/20/2010 - Priming and Sanding - 5 hours
Today I started by spraying a coat of UV Smooth Prime on the inside of the cabin top. I had thought that maybe spraying would work better for filling the pinholes, but I don't think that is the case. In the end I grabbed my roller and attempted to force the primer into the pesky pinholes. I had some success, but I will definitely have to apply more coats.
Next, I decided that I wanted to fill the joggles on the inside of the cabin top around the rear windows. So I sanded around the windows and then I applied a thick mixture of micro covered with peel-ply.
|
 |
| |
|
The rest of the time was spent sanding.
I guess I should mention that I plan to paint the inside of the cabin top. I figure I can always add a headliner later if I decide to, but this will finish it adequately and it will be clean looking. |
 |
| |
|
4/21/10 - More Priming & Sanding - 2 hrs
This morning before work I finished sanding off most of the last coat of primer and then I sprayed a new coat. The pinholes are slowly disappearing, but we're not there yet.
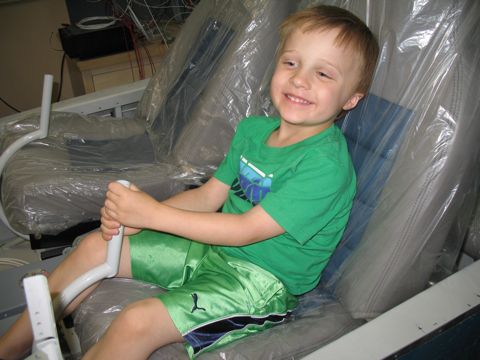
This evening I had a few visitors. My sister brought her kids to town, and it's the first time they got to see the plane, so naturally we had to make some airplane noises together! |
 |
| |
|
4/23/10 - More priming - 2 hours
Every time I think I'm getting close, I find more spots that need work. So I'm continuing to oscillate between sanding and priming. |
 |
| |
|
4/24/10 - Cabin top stuff - 5 hours
I spent about half the day just cleaning up the workshop. It seemed like everything was coated with dust, so I pulled the wing cart out and tried to clean up as much as possible.
I finally went ahead and riveted the center post in place. |
 |
| |
|
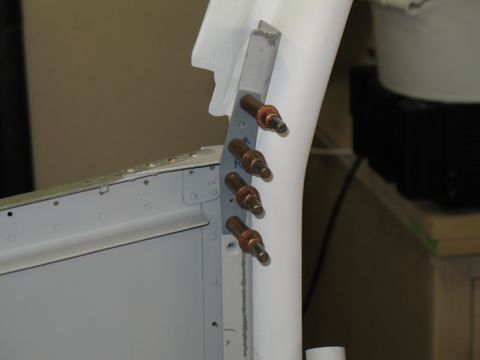
One feature that I've been trying to decide what to do with is the bracket (or brackets) that hold the pneumatic strut to the cabin top. These are metal brackets that are bolted to the cabin top, and I hate to glass them in at this point. So I decided that I would try to create a cover for each of them.
|
 |
| |
|
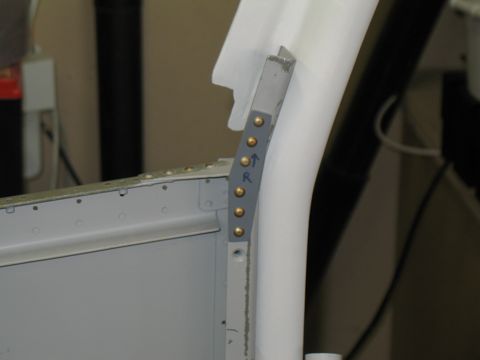
So I started by masking over the brackets with duct tape. Then I used wax as a mold release.
|
 |
| |
|
These are the squares of 8oz cloth I used.
I used five plies of 8oz cloth on each bracket. |
 |
| |
|
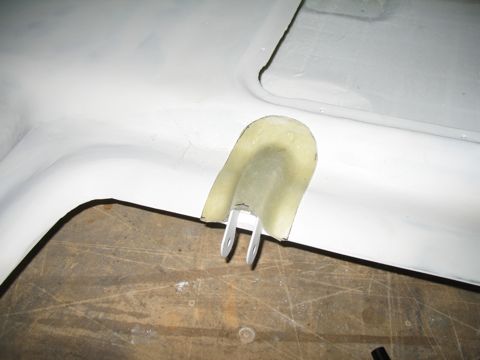
After a few hours the caps were ready to be removed. The mold release did its job and I ended up with two fairly rough caps for the brackets. Tomorrow I will attempt to trim these down and then I will figure out how I am going to attach them.
|
 |
| |
|
| |
 |
| |
|
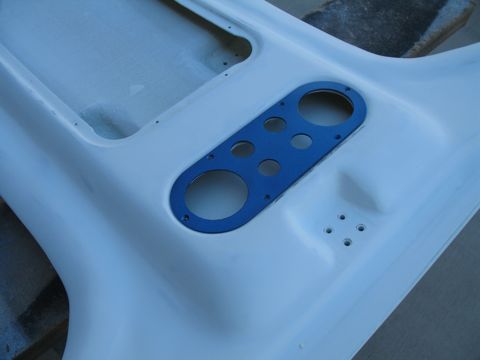
I experimented with some metallic spray paint that I bought at Lowe's. I'm thinking of using this on the aluminum inserts. It looks pretty good I think. |
 |
| |
|
4/25/10 - Finishing up - 4 hours
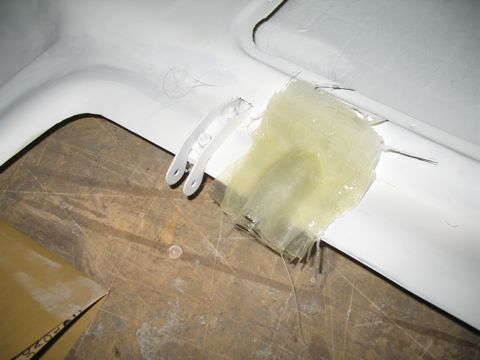
With a little bit of trimming my covers are starting to look okay. I will trim these down even further before I'm done. I also need to decide on a way to fasten these. |
 |
| |
|
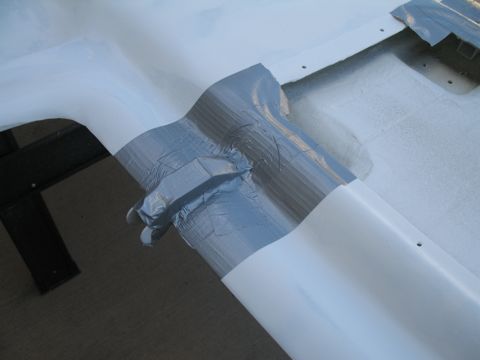
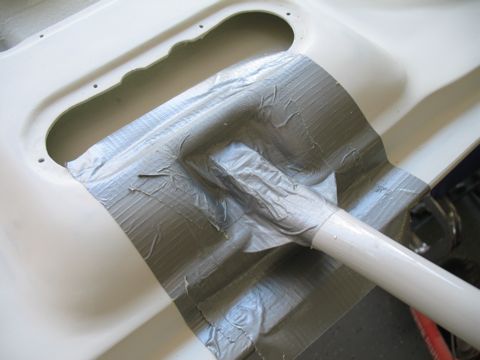
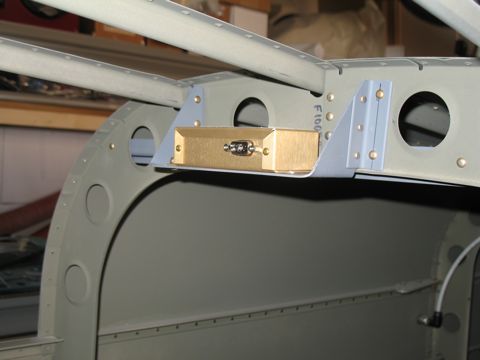
Next I decided to make a cover for the place where the support bar meets the cabin top. I figured it would be a lot easier to do this while the cabin top is upside down on the workbench. So I covered the area with duct tape and mold release.
|
 |
| |
|
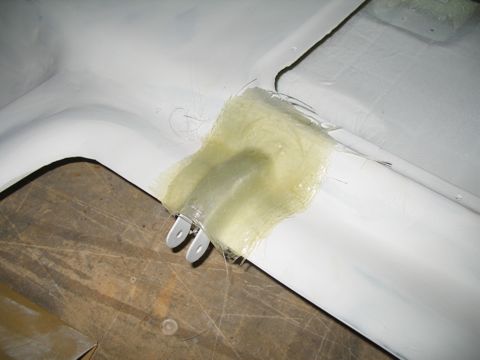
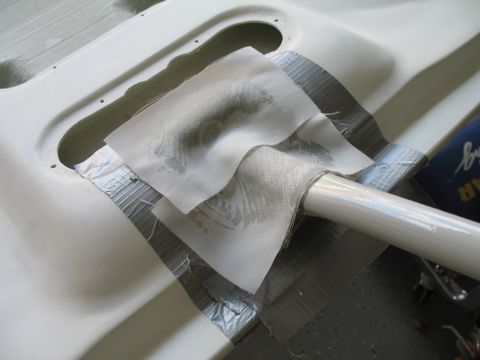
I used five plies of 8oz cloth, as well as some peel-ply. This cover is going to need a lot of work, but at least it's a start.
|
 |
| |
|
So with one more coat of UV Smooth Prime and a little more sanding, I finally decided to put it back on the fuselage.
I am waiting on a low profile LED fixture that hopefully I can use for the baggage compartment. When it arrives I hope to install it in the aft section of the overhead console. Then I will begin the process of permanently attaching the cabin top.
|
 |
| |
|
5/2/2010 - Misc. - 6 hours
|
 |
| |
|
| |
 |
| |
|
| |
 |
| |
|
| |
 |
| |
|
| |
 |
| |
|
5/5/2010 - Mounting the Cabin Top- 5 hrs
I keep thinking that there's some reason that I need to leave the cabin top loose on the fuselage, but it's been over a week and nothing is coming to mind so I decided that it's time to make some progress. If I can get the cabin top installed then I can get back to the doors and finally start finishing a few items on my list. |
 |
| |
|
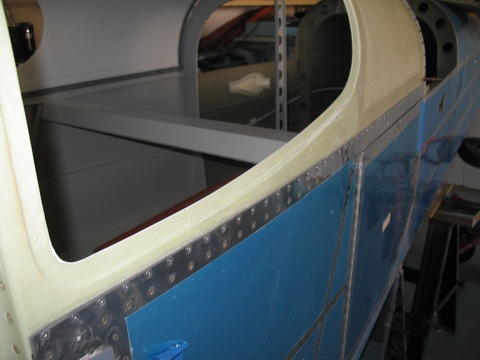
I started with the pop rivets along the sides. I decided to leave the aft skin open a little longer to make it easier to access the tailcone area.
|
 |
| |
|
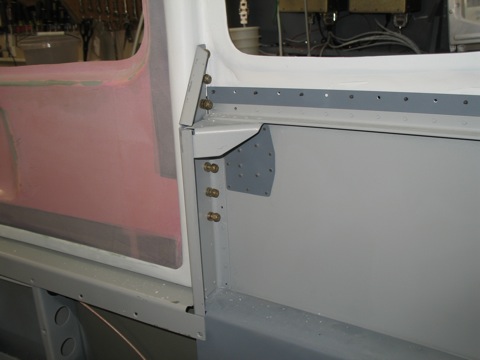
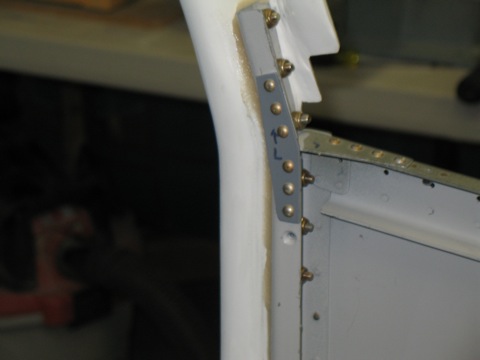
Before I riveted the sides, I went ahead and loosely fit the hardware around the door opening just to make sure everything stayed aligned properly.
|
 |
| |
|
The hardware is fairly easy to install at this point, since I don't have my avionics installed yet.
|
 |
| |
|
After a while I didn't have clecoes holding my fuselage together!
|
 |
| |
|
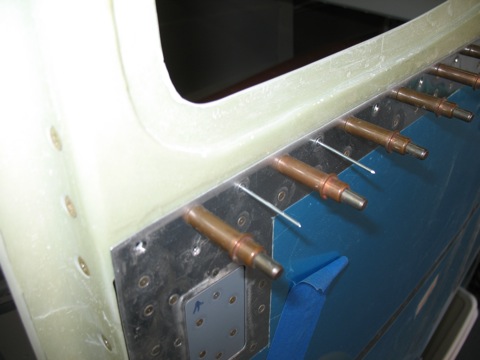
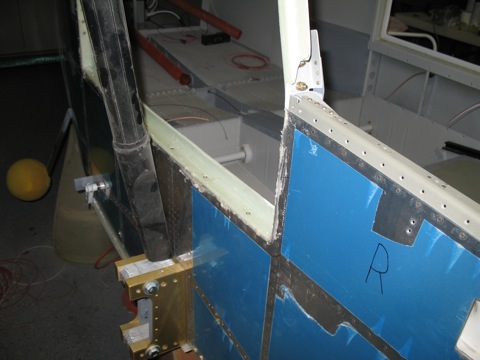
Next I mixed up some cotton fibers and epoxy, and I used a syringe to inject the mixture between the door frame and the cabin top.
|
 |
| |
|
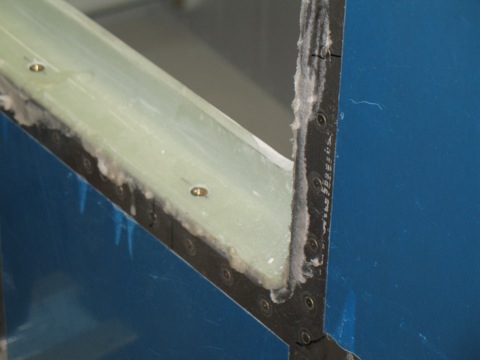
Once the epoxy/glass mixture was in place, I tightened up the hardware, but not too tight.
|
 |
| |
|
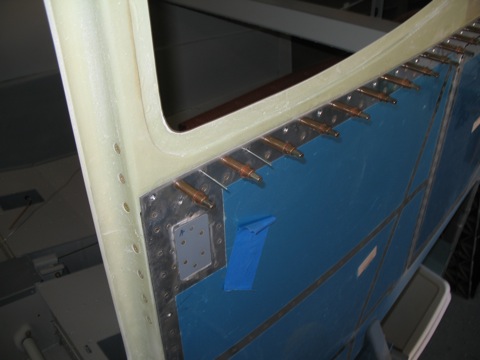
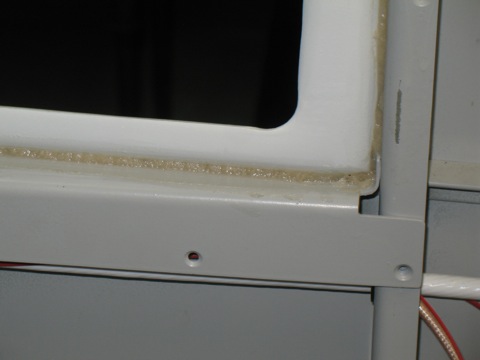
This will eventually receive another filler to ease the transition.
|
 |
| |
|
The outside joint will eventually disappear with filler and sanding.
|
 |
| |
|
| |
 |
| |
|
| |
 |
| |
|
It's finally attached!
|
 |
| |
|
Next: Doors (again)
|
 |

