Previous: Section 38-39 |
| |
|
2/15/09 - Section 40 - Flaps - 5 hours
This was another fun section, so again lots of pictures of metal and hardware and clamps and tools. Yay. What can I say, the Daytona 500 was on TV so I was compelled to use power tools.
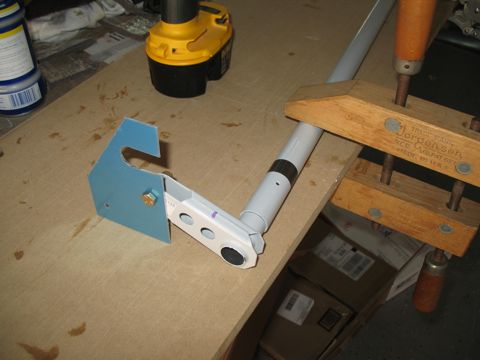
The flap torque tubes are mostly done, but they need to be match drilled to the flap crank and horns. Van's includes a template for setting the angles, so I just followed the instructions. |
 |
| |
|
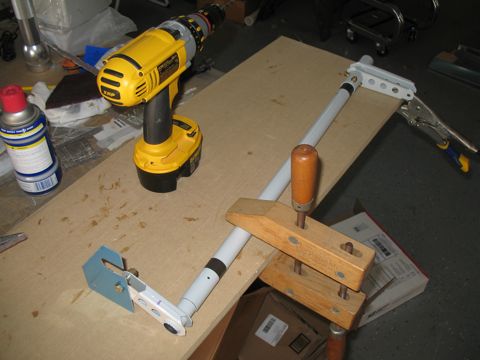
I used a piece of MDF to clamp the torque tube in place.
Again, I was watching the race and forgot to take pictures, but it's pretty straightforward.
One thing I should mention is that the UHMW bearing blocks are cut |
 |
| |
|
2/17/09 - Flaps - 2 hours
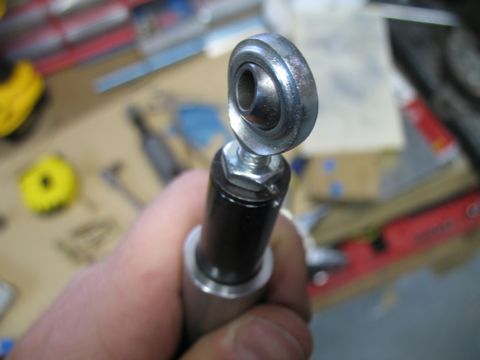
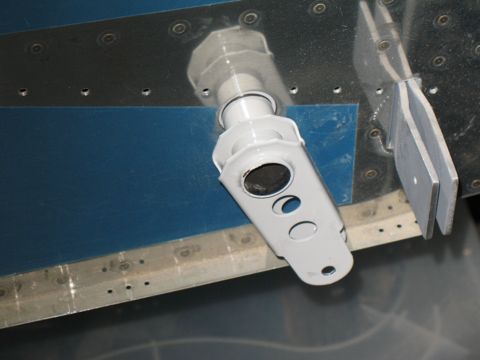
The flap motor already has a rod end bearing installed. I had to drill a small hole to allow safety wire to be attached. |
 |
| |
|
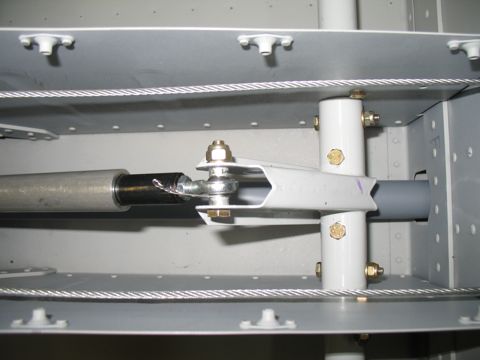
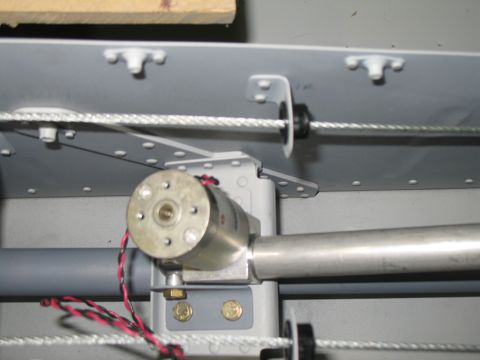
Here is the flap crank and motor installed.
There were a bunch of spacers that needed to be cut from aluminum tubing. This is what took up most of my time. |
 |
| |
|
I ran the motor using a battery borrowed from my cordless drill. This helped with installing the flap horns and the associated hardware. |
 |
| |
|
| |
 |
| |
|
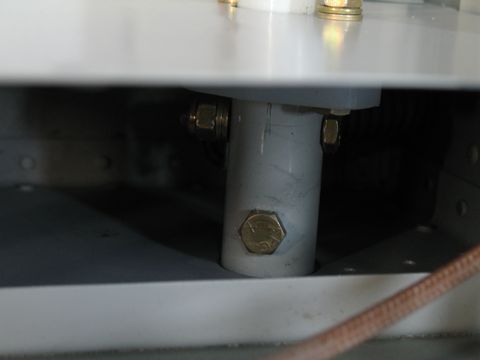
The hardware that attach the flap horns are a bear to install because of the tight space.
|
 |
| |
|
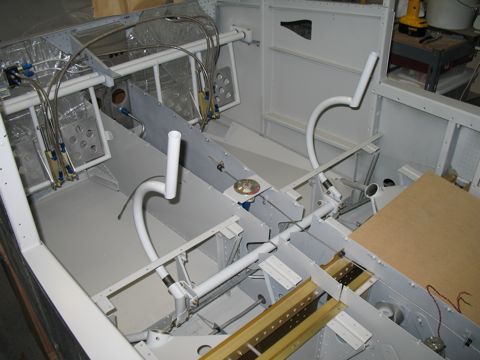
So here's the current status of things: rudder pedals are in, breaks are in, control sticks are in and hooked up, and the flap controls are in.
|
 |
| |
|
4/30/09 - Section 41 - 2 hours
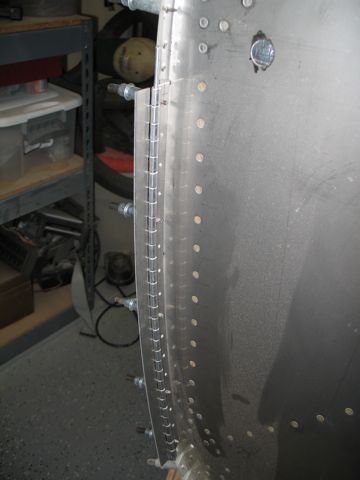
I installed the hinges around the firewall. These hinges will eventually hold the cowl in place. This system works remarkably well on the -9A so I don't plan to change it for the -10.
I have seen the camloc installations on other RVs and my opinion is that it looks ugly to have all those fasteners around the cowl. The hinges are invisible, and they make removing the cowl a relatively quick and easy process. |
 |
| |
|
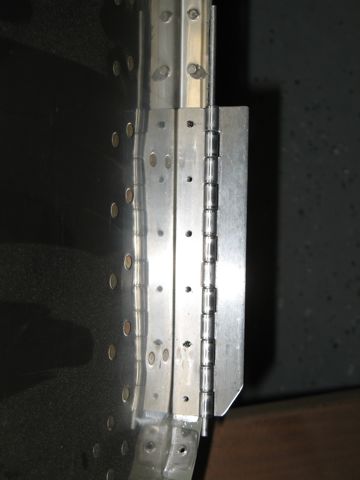
5/2/09 - Hinge installation - 2 hours
You can't see it here, but there are doubler strips that go between the hinge and the firewall flange. This provides the needed additional distance to account for the thickness of the fiberglass cowl. |
 |
| |
|
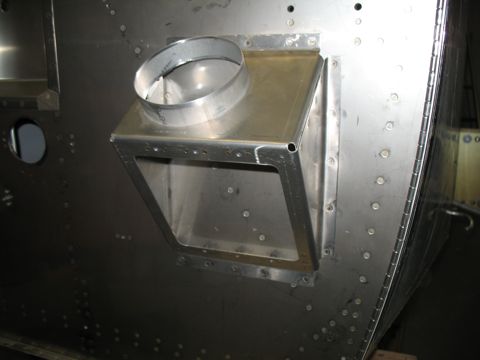
5/3/09 - Oil Cooler Bracket, etc. - 4 hours
I finished up the work on the hinges and then started looking at permanently installing the forward fuselage. I realized that I would lose access to the firewall once I do this, so I stopped and moved my attention to some things that will eventually need to be done but would be much easier now, while I have easy access to the firewall.
One of these is the oil cooler bracket. This gets riveted to the firewall, but there is no mention of it until the section on hanging the engine. I decided it would be better to install it now while I can still rivet it by myself. |
 |
| |
|
| |
 |
| |
|
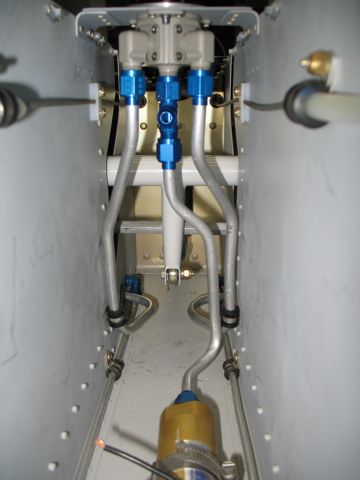
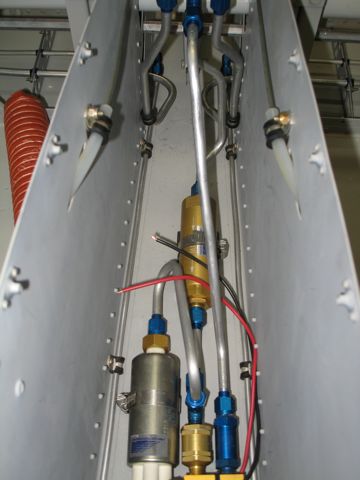
5/7/09 - Fuel Line Redo - 4 hours
I had to order new fuel line from Vans so I could replace the incorrectly plumbed lines from section 37. In that installation I had blindly followed the instructions, ignoring the fact that I have a different fuel tank selector than the stock one that Vans ships.
So I had to remvoe the two long runs that go out to the fuel tanks. It's considerably more difficult to access this area now that the controls are installed. |
 |
| |
|
| |
 |
| |
|
Also, I finally plumbed the remaining line for the fuel pump.
Next: Section 42: Cabin Top |
 |

