Previous: Move and Final Prep |
| |
|
5/16-5/31 - More Final Stuff - 40 hours
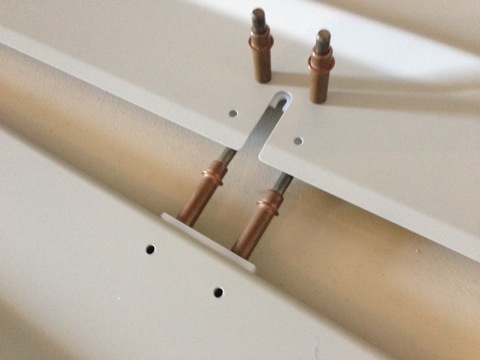
Taking care of some unfinished items I realized that I hadn't installed the guide blocks for the rear seatbelt cables. This was an easy task that could have been done long ago. |
 |
| |
|
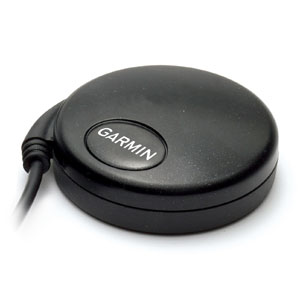
One thing I did that I don't have a picture: get my GPS antenna working. I had purchased a GPS-18x antenna to permanently install in the plane as a gps source. This is a neat little package that once configured can supply a continuous stream of position information to whatever device it is attached to.
The downside to this device is that it needs to be configured before use with my AF4500 EFIS and to do that I had to connect it to an old PC serial port and change the output format and baud rate. Not difficult but sort of a pain since a connector had to be made just for connecting to the PC and then cut off when finished.
The AF4500 has a nine pin expansion connector that has a serial port and +5v, which is perfect for connecting this antenna. So I put this antenna up in the overhead console and ran the wire down the rollover tube to the EFIS.
I did this when the plane was in the old hangar and I couldn't get any GPS signal, but I assumed since I was seeing serial data on the line that it was working.
Flash forward to this month. Time to play with the electronics. I dragged the airplane outside and easily got a GPS signal on my portable GPS, but wasn't seeing anything on the serial line from the GPS-18x. Well, to make a long story short, I had configured the EFIS for an AFS GPS, which has a slightly different configuration than this GPS. As soon as I changed to NMEA 4800 it worked. |
 |
| |
|
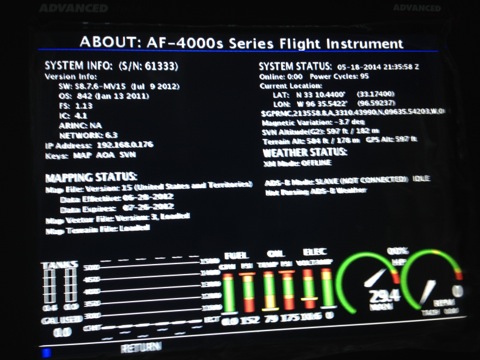
This GPS also supplies a signal to the autopilot, so I turned that on and it needed to be configured as well. Once I made the proper adjustments to the autopilot I was in business.
The only problem I was having is that the EFIS wasn't seeing the ARINC adapter. This is important because the ARINC is what is used to control the autopilot from the EFIS and the IFR GPS (if I ever get one.)
No matter what I did I couldn't get the arinc adapter to register on the EFIS. So I pulled the arinc module and traced all the wires to make sure I didn't make any wiring mistakes. |
 |
| |
|
I couldn't find any problems with the wiring, so I decided that it was either software or hardware. Looking at the software instructions I noticed that the ARINC module software needs to be updated along with the EFIS software. Since I knew that I had never updated the ARINC software I began to suspect that possibly there was an inconsistency between the devices.
Another long story made short: I found and downloaded the latest EFIS software, which also contained an update to the ARINC software. Once both devices were updated I was able to communicate between the two successfully.
Now if I enable the Autopilot to follow the EFIS, I can "steer" the airplane with the EFIS.
|
 |
| |
|
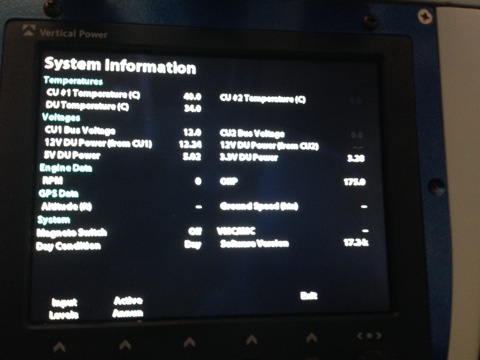
While I was at it I also updated the software on the VP200. I was so far removed from the current software version that I had to perform multiple updates to get to the latest.
|
 |
| |
|
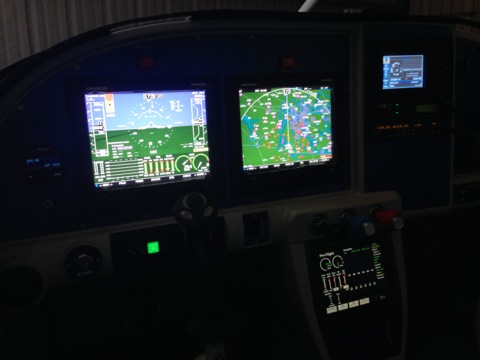
Here is a dark hangar picture of the panel with the screens all running.
|
 |
| |
|
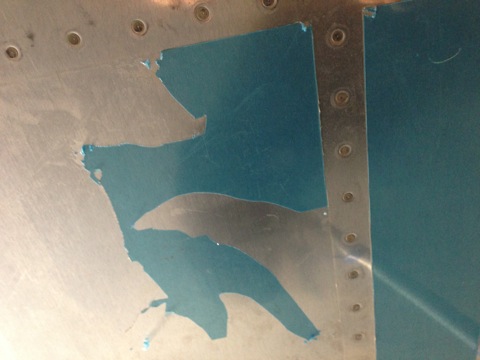
Time to peel of the blue plastic! So I started at the tail and began working my way forward. All went smoothly until I got to the underside of the left wing, which is where I began to have problems.
There was a 3ft x 3ft section near the root that I had considerable trouble removing the blue stuff.
Some of the plastic began to tear instead of just coming up in one solid sheet. Then it got worse. The plastic was bonded to the surface and I was unable to peel it at all. |
 |
| |
|
Upon further inspection I could tell that this part of the plastic was cracked. Thinking back to where I had the wings stored I must have had them located where this part of the wing was exposed to sunlight. That's the only explanation I can think of.
Fortunately it was a small-ish area and by using a heat gun and a tongue depressor (a big popsicle stick) I slowly scraped the plastic residue. I then used Goof Off, lighter fluid, and WD-40 to remove the remaining glue residue.
All of this took most of a day. |
 |
| |
|
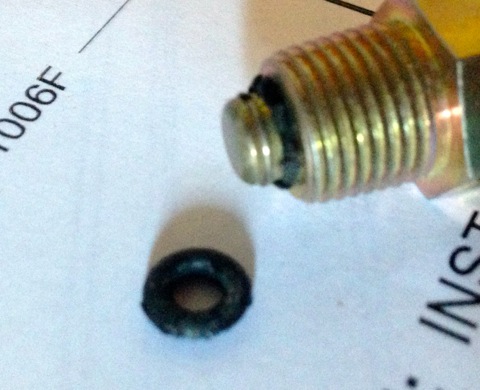
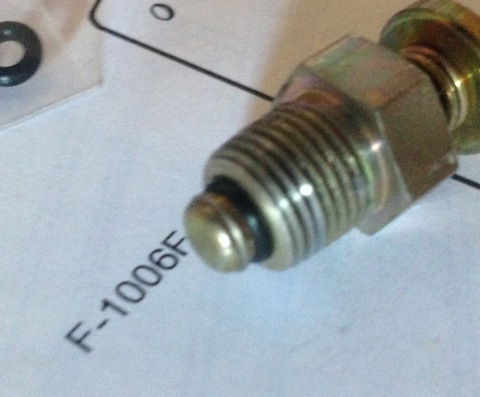
Here's another example of me taking too long to build the plane. I went to install the fuel quick drains in the wing roots. When I grabbed the parts from their little storage drawer I noticed that the o-rings had deteriorated and were falling apart in chunks. Not good for a fuel system. |
 |
| |
|
I found that Vans sells replacement o-rings for these drains, so I ordered a handful and all is good.
|
 |
| |
|
I didn't get pictures of this process either, but I bled the brakes. I used ROYCO 782 brake fluid.
I used the same oil can that I had used on the other plane. It worked like a charm and I was able to do both brakes in 20 minutes or so.
I still made a mess with the brake fluid. That stuff seems to find a way onto the floor no matter how careful I try to be. |
 |
| |
|
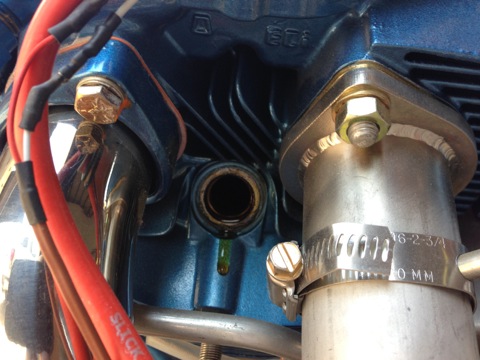
Time to get the engine ready. It had the preservative oil in it for a while. So I removed the drain plug from the oil pan and then started working on installing the spark plugs.
|
 |
| |
|
The bottom six plugs (there are two spark plugs per cylinder) are the traditional aviation plugs. These are installed and then torqued to 35 foot pounds.
|
 |
| |
|
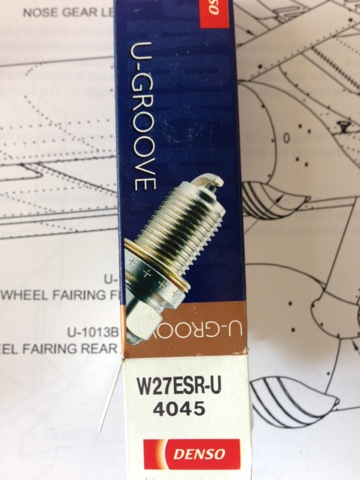
The upper plugs are the ones controlled by the electronic ignition system and are automotive-style plugs. These require a reducer to be installed first. So the reducer is torqued to 35 foot pounds and then the plug is torqued to 25 foot pounds.
|
 |
| |
|
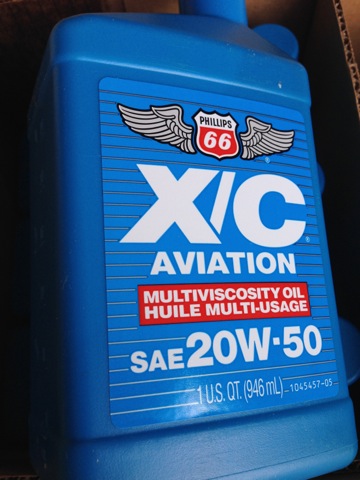
This is the type of oil that is recommended for my engine. It is 100% mineral oil but apparently it is designed to be used from break in all the way through TBO.
|
 |
| |
|
I installed an oil quick drain. I had one of these on the -9A and it worked well, so I put one on this plane too.
The preservation oil took a while to completely drain. I think it was way over an hour that I let this stuff drain out.
When it finally stopped draining I closed it up and added 12 quarts of the Phillips 66 oil.
I was wearing my AeroShell t-shirt. |
 |
| |
|
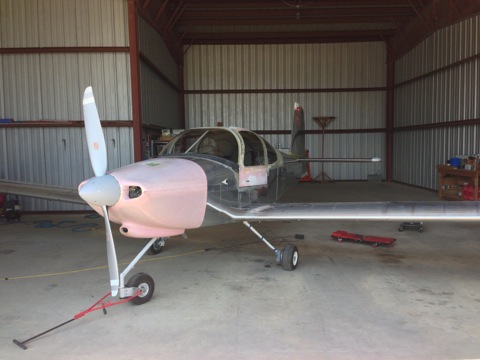
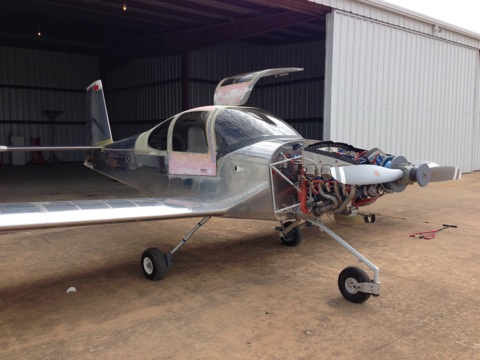
Here is the plane with all the blue plastic removed.
|
 |
| |
|
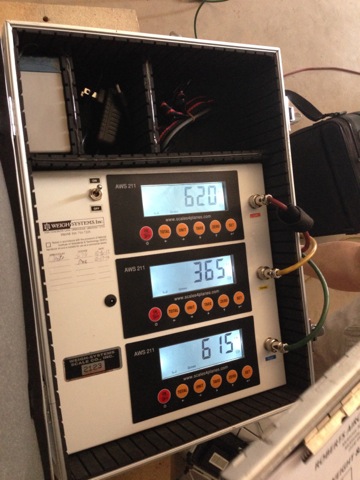
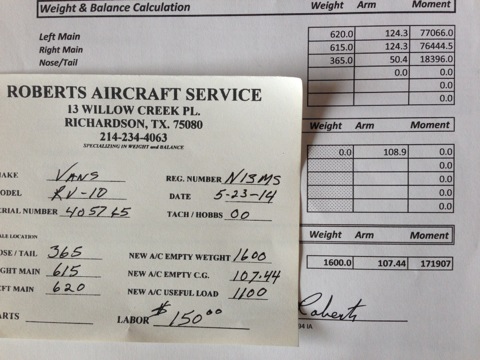
Time to get the plane weighed. A local pilot and A&P does this on the side, so I had him come to the hangar with his equipment. It didn't take long.
|
 |
| |
|
Here is the plane up on the scales. Notice that I had set all the fairing stuff on top of the plane.
|
 |
| |
|
The final verdict: 1600 pounds.
|
 |
| |
|
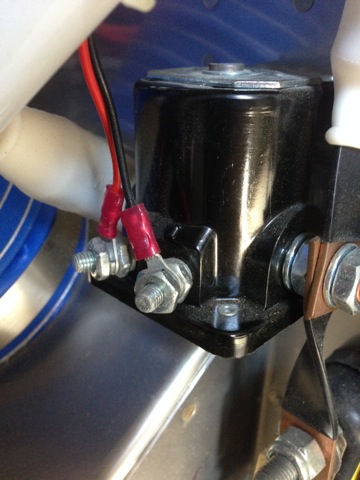
I was preparing to get to a point where I could start the engine. I needed to know if the starter would function so I decided to attempt to spin the prop with the starter.
The result: nothing. Just a click whenever I pushed the start button. Not good. |
 |
| |
|
I finally traced down the problem. I had mistakenly wired the starter solenoid incorrectly. For some reason I thought the second lug was a ground. Not true. This is a +12v feed that is powered whenever the starter solenoid is engaged. It can be used to power an indicator to show if the solenoid is powered.
So whenever the starter was engaged I was shorting it out at the same time. |
 |
| |
|
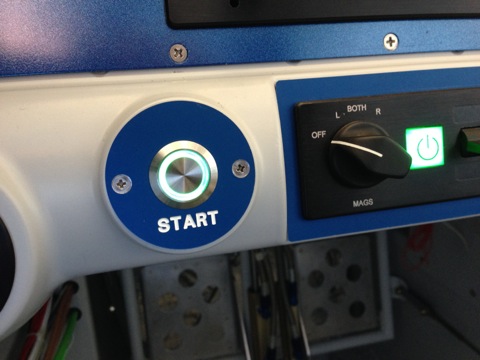
Here is my start button all lit up. The VP200 enables the light around the button when it is in "before start" mode.
With the wiring cleared up the starter worked properly, but unfortunately the battery was dead, so I put it on the charger and left.
We came back on the weekend to attempt an engine start, but the battery was still not up to the task. It would barely turn the prop, and would stop before the compression stroke.
So I had to order a new battery. |
 |
| |
|
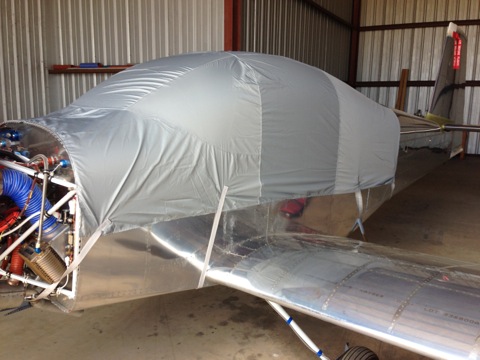
I also ordered a cover. This old hangar is really dusty. Hopefully this will protect the transparent parts.
|
 |
| |
|
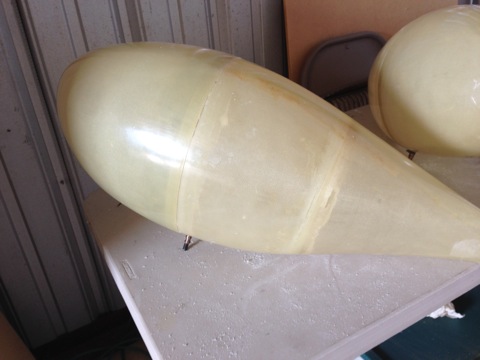
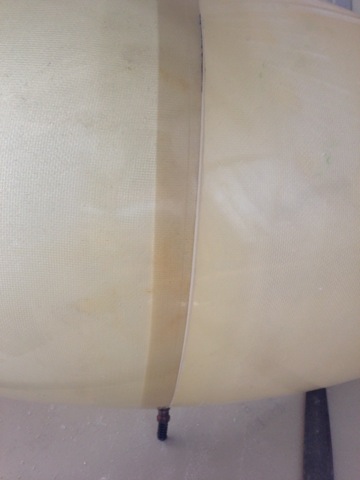
I started working on the gear fairings. This is not fun.
|
 |
| |
|
| |
 |
| |
|
Next: Gear Fairings |
 |
| |
|

