Previous: Section 43: Cabin Cover |
| |
|
8/30-9/1/09 - Section 45: Doors - 10 hrs
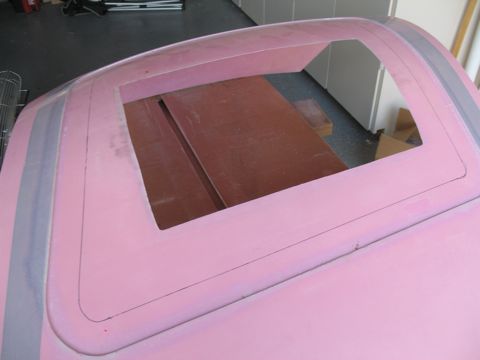
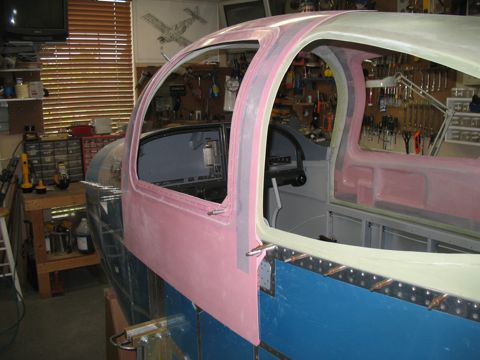
Time to tackle the doors. Mine are pink because Vans made a change in their fiberglass manufacturing between the time I received my fuselage kit and the time I received the finishing kit. So some of my fiberglass parts are green and some are pink.
First things first, I had to trim the outer edges of the door parts according to the plans. |
 |
| |
|
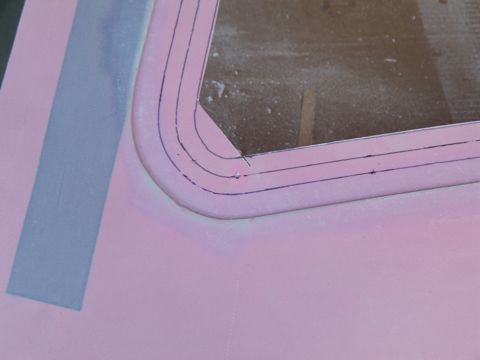
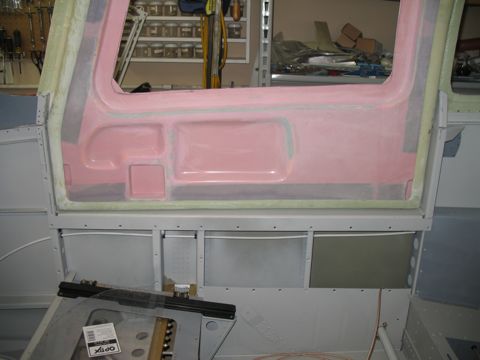
The next step is to draw a bunch of lines to denote where to trim the window openings and where to eventually drill holes.
|
 |
| |
|
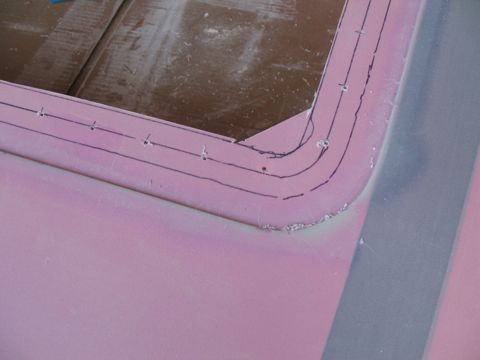
I then drilled holes around the perimeter of the window openings. These are about 1.5" apart.
At this point I will complain about the reference holes that Vans molds into the parts and how they are not even close to being correct, or how they don't match their mating part in any way that is useful.
Okay, so that's out of my system. My experience is that it is best to just pick one reference hole and ignore the others. Or you might want to just make your own reference holes.
If none of this makes any sense, then read on. |
 |
| |
|
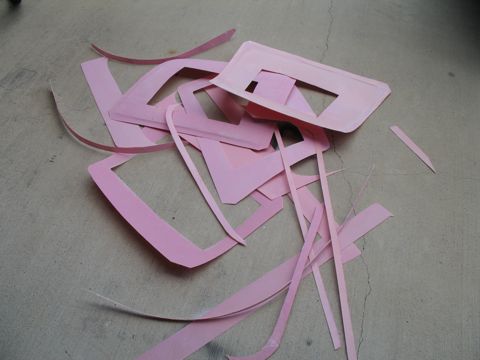
And here's the carnage from all the trimming...
|
 |
| |
|
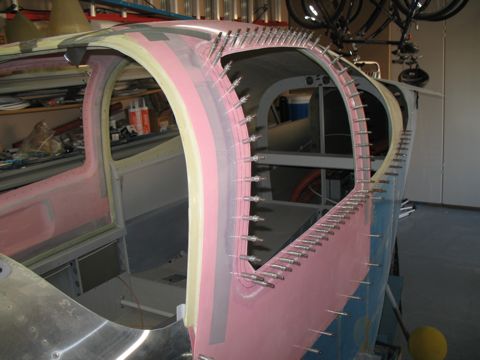
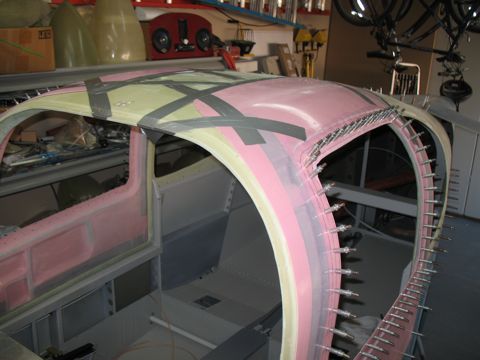
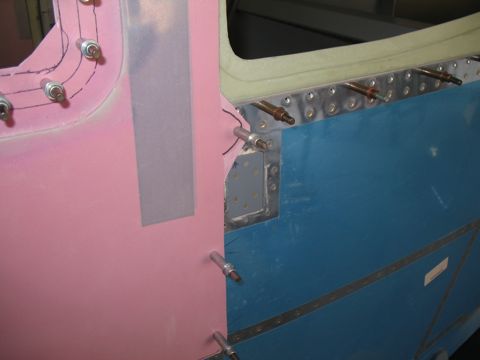
Here are the door parts as they are temporarily clecoed to the fuselage.
Remember the reference holes? This is where you will figure out that the holes in the outer door piece don't match up with the holes in the inner door piece. So I ended up just picking one set of holes that were close to each-other and then match-drilling the other holes. |
 |
| |
|
| |
 |
| |
|
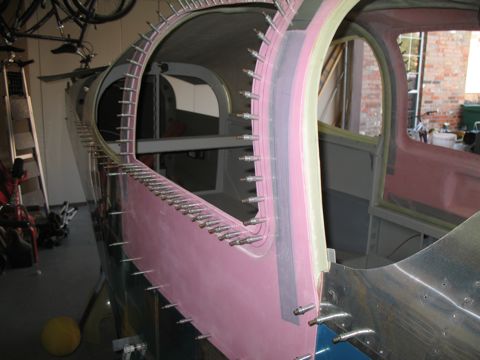
Way back when I assembled the fuselage I had to be careful to leave certain rivet holes open. At the time I didn't fully understand why these rivets were left out of the skins on the sides of the fuselage, but now I can finally comprehend the madness.
The holes in the fuselage are match-drilled through the fiberglass doors. I used my hole finder and it was pretty easy. The doors are held to the fuselage using clecoes and duct tape.
Once the doors are held tightly around the shape of the fuselage it was possible to match-drill the holes around the window openings. |
 |
| |
|
| |
 |
| |
|
| |
 |
| |
|
At this point I figured out that I need some cab-o-sil before I can go any further with the doors. I ordered 1gal bag from Wicks, which should last forever.
|
 |
| |
|
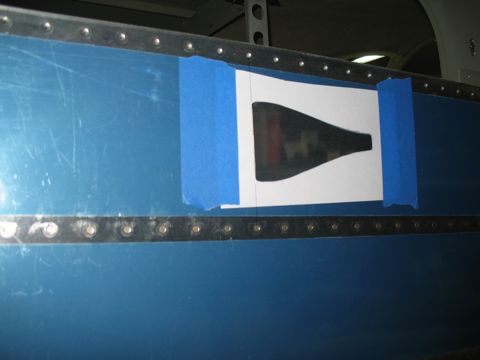
9/2/09 - NACA Vents - 3 hours
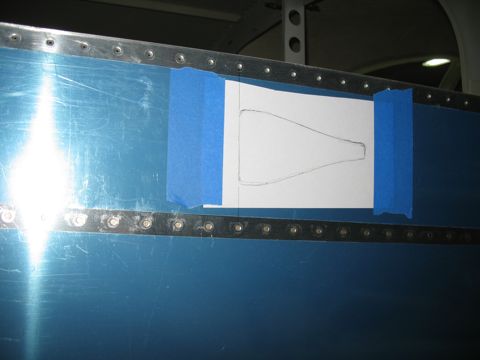
The vents in the overhead console need a source of outside air. So I am cutting both sides of the tailcone to accept NACA vents that I ordered from Vans.
Step 1: I traced the naca vent opening on the forward fuselage onto a piece of paper.
Step 2: I determined the location where I wanted my new NACA vents to go. |
 |
| |
|
I drew a vertical line between two rivet holes and then used that line and a line I drew along the aft edge of the NACA vent tracing to determine the position. I also centered the opening between the rivet holes.
|
 |
| |
|
Step 3: I cut around the tracing with an x-acto knife. Then I removed the blue plastic and traced the opening with a sharpie.
|
 |
| |
|
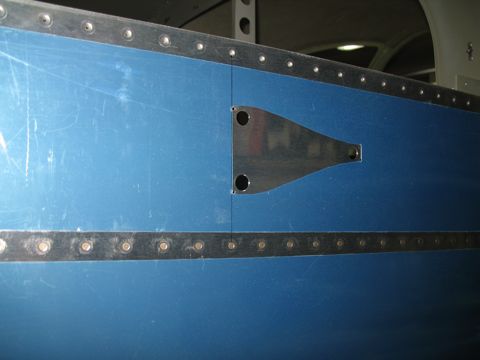
Step 4: I drilled holes in each corner to avoid having sharp corners. I also drilled larger access holes for the saw blade.
|
 |
| |
|
Step 5: Using a jigsaw and a metal-cutting blade, I carefully cut around the edges of my tracing.
|
 |
| |
|
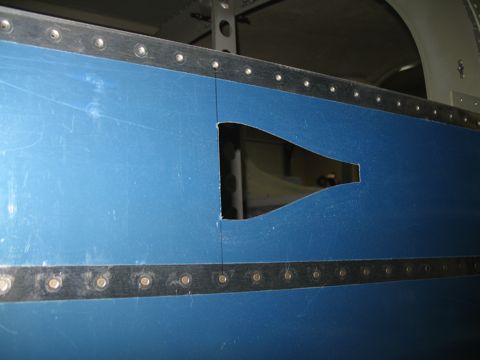
Step 6: I spent some time with a file cleaning up my mess.
So now I am ready to bond the NACA vents in place.
Next: More Overhead Console Work |
 |

